
How to Start a WordPress Blog on SiteGround Step-by-Step

Determined to start a blog but don’t know where to start? Web host like Siteground just made it simple to host your own blog even if you’re not tech-savvy or don’t know how to code.
In this post, I’m going to show you exactly how to create a blog with easy-to-follow screenshots and step-by-step written instructions, as well as all its benefits that you can’t miss out on!
1. Choose a Siteground plan
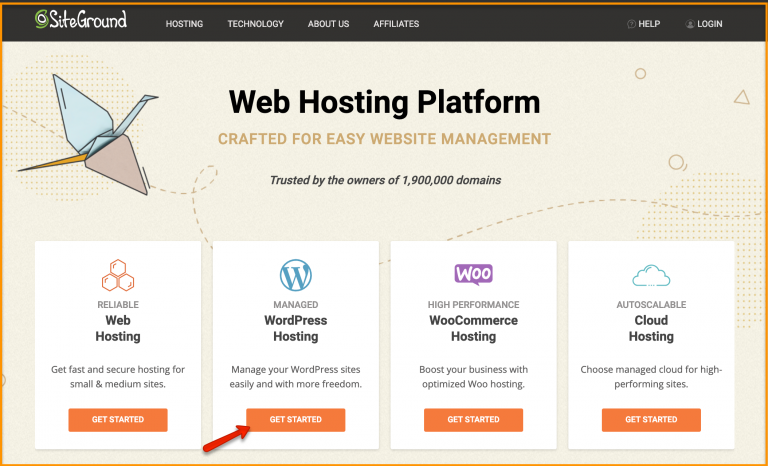
To start a WordPress blog, go to Siteground official site. Now you’re at the landing page and you’ll see few main hosting options.
In this tutorial, our aim is to create a self-hosted WordPress blog. To continue, go to WordPress Hosting and click “Get started” button under it.
As you can see, Siteground offers three different hosting packages depends on your needs and budget:
- StartUp – Start from $3.95/month
- GrowBig – Start from $5.95/month
- GoGeek – Start from $11.95/month
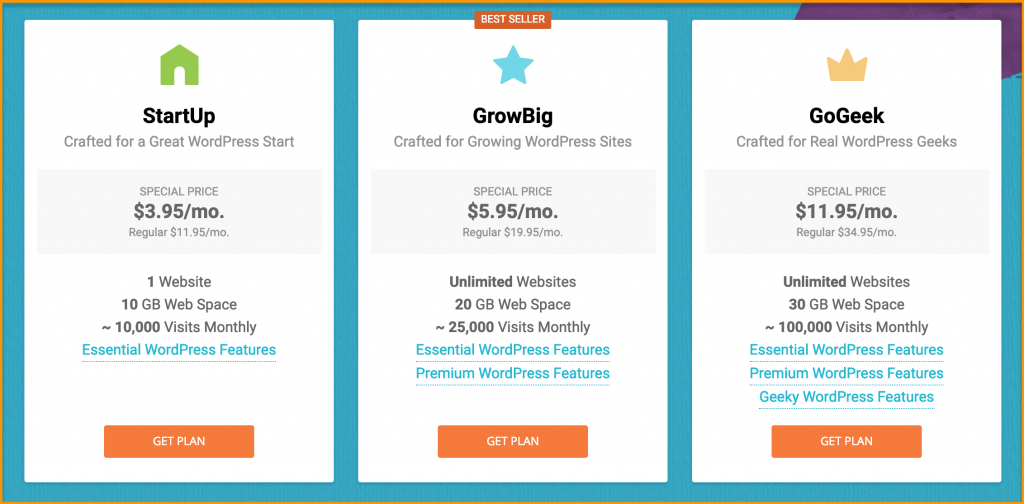
As for the plan, I would suggest you start with the least you can afford, you can always upgrade later as your website grows.
If you’re starting out and manage only one site, then you can go for Startup plan for less than $4 a month.
Startup hosting plan is best for beginners who have a tight budget.
If you plan to have more than one blog, GrowBig (Best Seller) would be the best choice for you. For an extra $2, you can host unlimited websites on Siteground.
And I would recommend GrowBig (if possible), because of the SuperCacher feature.
Supercacher is a powerful caching solution that optimizes your website performance and boosts your site’s loading speed. In short, your blog will be able to handle high traffics and loads faster!
If you want to start an e-commerce site or already have tonnes of blog traffic every month and want to switch from some other host, then GoGeek is the perfect hosting plan for you.
By now, you should know which Siteground hosting plan you is right for you.
Select the hosting plan that’s most suitable for your need and click “Get Plan” button.
2. Register a domain
Next, you’ll need to choose a domain name for your website/ blog. It’s a very important step that you want to do it right from the very beginning.
It can be a real hassle if you decide to change it later. Which will cost you not only money but also affect your SEO rankings and your brand’s reputation.
Choosing a domain name for your blog can be tough, but it would be much easier if you follow these tips.
Tips for choosing a domain name
- Keep your domain short, concise and easy to remember. But most of the short domain names are already taken. You can use this domain name generator to turn your ideas into fresh, available domains.
- Make it easy to pronounce, spell and type.
- Avoid using numbers, doubled letters, hyphens, acronyms, long and confusing name. You don’t want your visitors to mistype your domain and end up on a different website, resulting in loss of traffic.
- Go for .com extension instead of others like .org, .net, .info, .biz. According to Registrar Stats research, over 75%of the domains have “.com”, followed by “.net” and “.org”. “.com “is easier to remember and more familiar.
- Always Think Long-Term. As your domain name is the foundation of your online brand and identity, choose a name that resonates with your values, benefits and long-term goals.
- Use keywords related to your business in your domain. This can help to improve your SEO and rank higher in Google. BUT use it with caution, you don’t want it to look too spammy or generic.
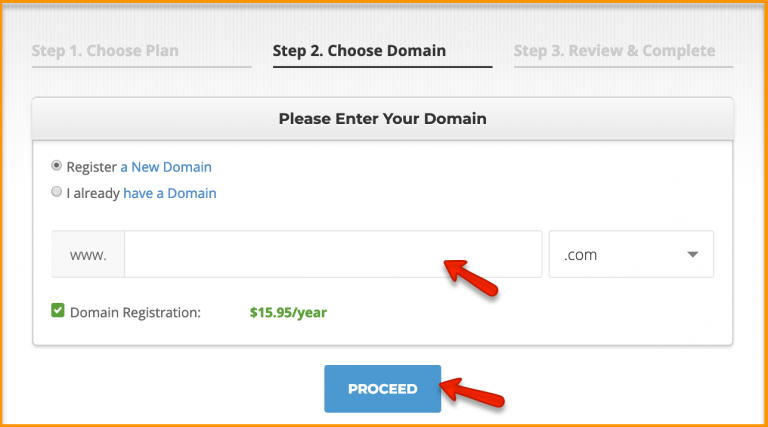
To register a new domain with Siteground, simply enter your domain name into the box and click “Proceed” to check its availability.
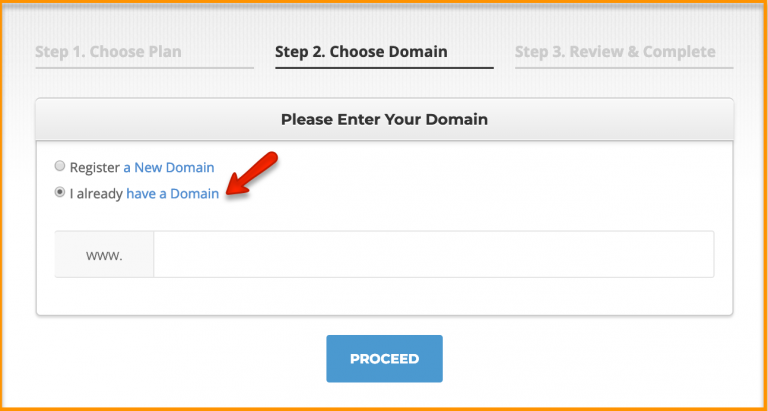
If you already have a domain, purchased elsewhere and want to use it with Siteground, select “I already have a Domain” and enter your domain to proceed.
Although you can register a domain with an external service like NameCheap and host it on Siteground, you’ll need to do an extra step of transferring your domain to your web hosting account.
To connect your existing domain to your Siteground hosting server, you’ll need to login to your NameCheap account, and modify your DNS Nameservers.
However, each domain registrar has a different interface of control panel. If you’re not sure how to do it, simply contact Siteground’s support team. They’ll guide and help you to set it up on the backend.
If you need further help, check out this Siteground tutorial on this topic.
If you don’t have a domain yet, I highly recommend you register your domain and host it at the same place. This way Siteground will take care of everything for you.
3. Review and Complete the Siteground order form
Now you’ll need to enter your personal information, contact details and billing information to proceed.

Then, scroll down the page, you’ll come to the “Purchase Information” section.
(a) Hosting Period
Unlike many other hosting providers who only offer the lowest monthly price for the longest period. What makes Siteground different is that you can get the cheapest price regardless of the initial periods that you choose during the sign-up process. But…
To save the most money possible, I recommend you get the hosting plan for 2 or 3 years term. Because you’ll need to pay at the regular price for your next bill.
You don’t have to compare with other hosting companies. It’s the same for all the other top web hosts out there, in which they only offer a promotional price on the first bill.
In other words, you won’t get any discount when you renew your plan.
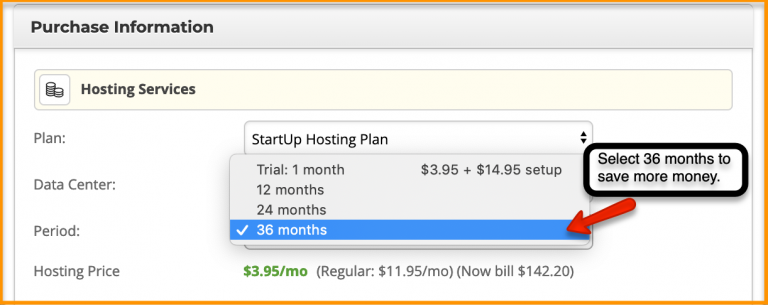
For example, if you’re buying the Startup hosting plan for one year (at only $3.95/month), the discount is only applicable for the first-year bill. So upon renewal, you need to pay full price ($11.95/month) for the second year. That means, you can actually save $96 a year just by choosing the longer term.
Want to get the best price and save more money? Select the period of 36 months, regardless of which hosting plan you’re going for.
(b) Data Center
There are 5 different server locations to choose from, namely Iowa, Chicago, London, Amsterdam and Singapore.
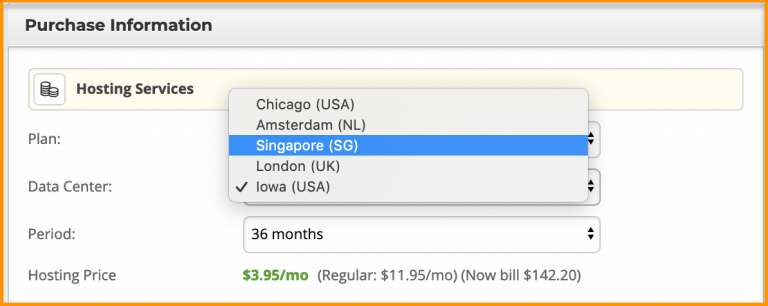
If you don’t know, your site speed and stability depend a lot on the location of your hosting data center.
So pick the data center located closest to your visitors for faster loading times.
(c) Extra Services
Here, you have the option to add extra features for your blog.
- Domain Privacy: To protect your personal information like contact number, email, and address from available to anyone online, you might want to get Domain Privacy.
- SG Site Scanner: This powerful security feature will give you peace of mind, monitor and protect your site from being hacked.
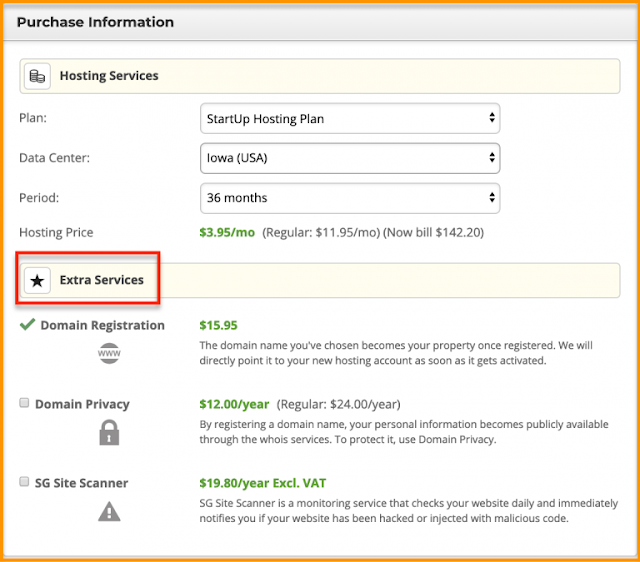
Simply check the box to get the extra services that you want. Once you’ve completed the Siteground ordering form, click “Pay Now”.
4. Install WordPress on SiteGround
Now you’ve successfully created your own website. The first thing you want to do is to install WordPress.
You can either have the Siteground team set it up for you or install it yourself in a few simple steps.
To contact Siteground team, simply go to Live Chat and give them your login details. They’ll get it done in 10-15minutes.
But I think it’s best if you could do it yourself. It’ll give your confidence a quick boost, especially if you’re new to blogging.
The process of installing WordPress is pretty simple and straightforward. Follow the steps below to start installing your WordPress blog.
1. First, login to your SiteGround hosting account.
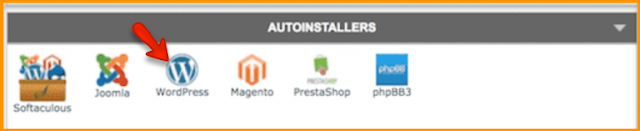
2. Under “My Account”, click “Go to cPanel.”
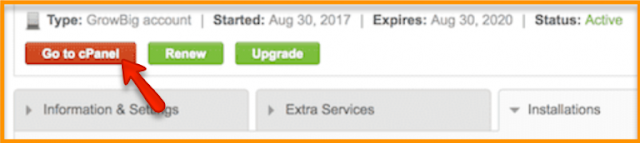
3. Click WordPress in the “Autoinstallers” section.
4. Next, choose the domain name that you want to install WordPress on.
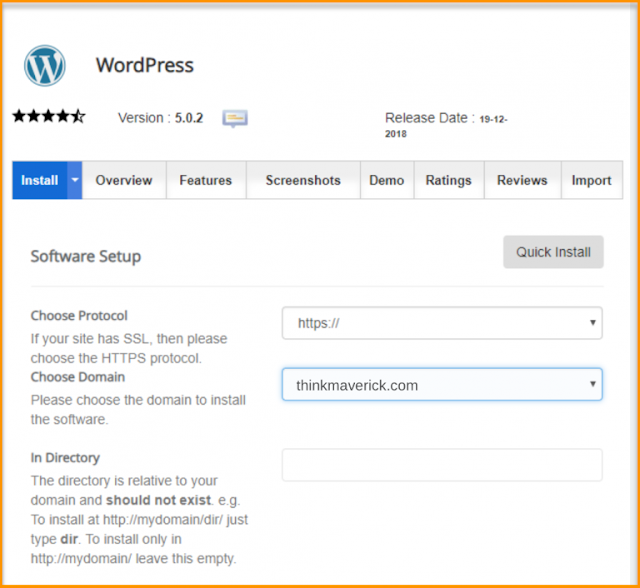
5. Enter your website name, admin user name and password. Then, click “Install”.
That’s it. Siteground will install WordPress for you.
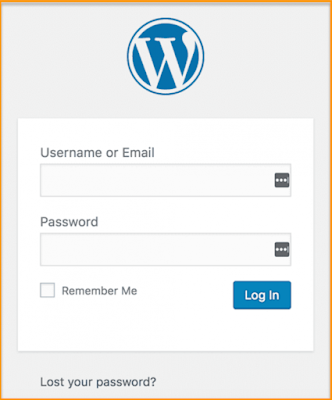
Once the installation process is completed, go to your WordPress dashboard (yourdomain.com/wp-admin). Login with your admin username and password you’ve just created during the WordPress installation process.
That’s it! You now have your new WordPress blog. Login to your WordPress board, choose a beautiful theme for your blog and start writing!
Do you have any concern not to self-host your own blog?
Do you have any problem or question following this tutorial to create your own blog with Siteground? Feel free to comment below


