
3 Different Ways to Install WordPress Plugins in 5 Minutes

After installing WordPress, the first thing every beginner needs to learn is how to install a WordPress plugin. Plugins allow you to add new features to WordPress such as add a gallery, slideshow, etc.
There are thousands of free and paid plugins available for WordPress. In this step by step guide, we will show you how to install a WordPress plugin.
How to Install WordPress Plugins Using Library?
Login to your WordPress dashboard/ Admin page.
On the left sidebar menu, click “Plugins” and then click “Add New”.
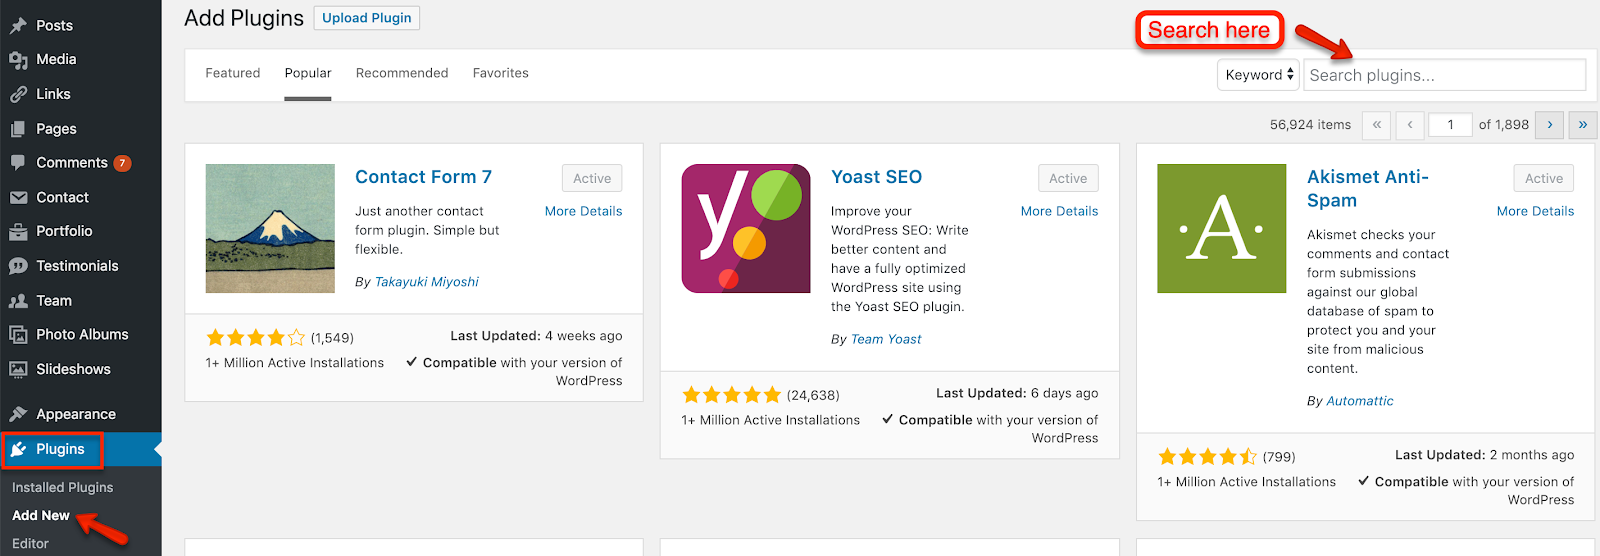
Now you’ll see a list of featured plugins on the plugin directory.
Simply type the plugin name (if you know) or the functionality you’re looking for (eg. SEO, contact form, etc) into the search box on the top right.
As an example, I entered Jetpack into the search box and here’s the result.
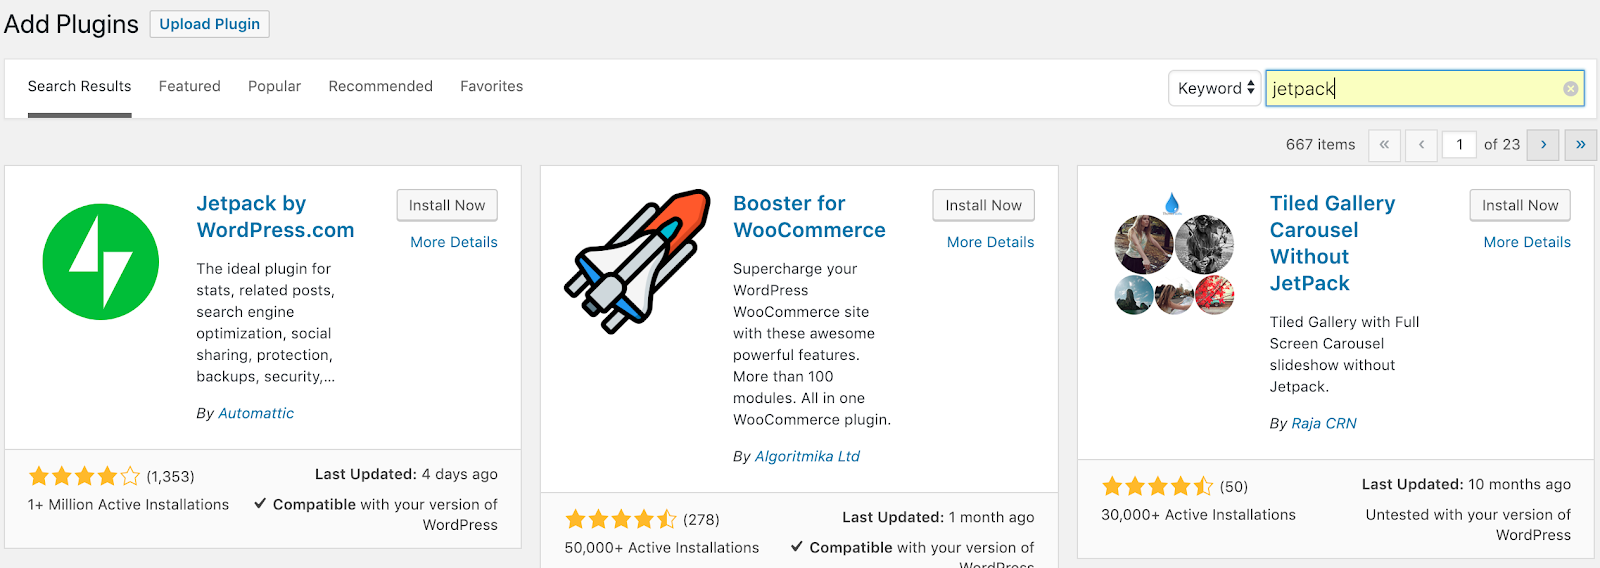
Browse through the search result and pick the plugin that you want.
Click “More Details” to get more information about the plugin. Make sure that the plugin is compatible with your current version of WordPress.
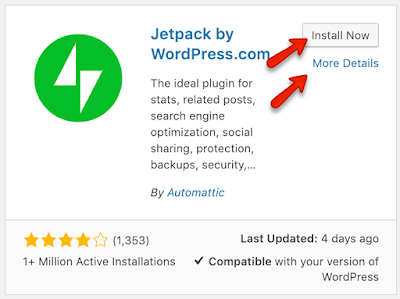
To install a plugin to your site, click “Install Now”.
Once it’s installed, you need to click on the activate plugin link to activate the plugin.
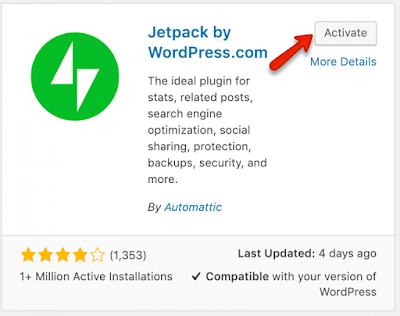
That’s it. Now you have successfully installed your first WordPress plugin.
How to Install WordPress Plugins Manually?
WordPress plugin directory only shows lists of free plugins, so you can’t install any paid/premium plugin using the method as discussed above.
Instead of using search in the WordPress dashboard, we use the Upload method to install a paid plugin in this case.
First, you need to download a WordPress plugin from the source.
Next, go to your WordPress dashboard, click “Plugin” and then “Add New”.
On this page, you’ll see the “Upload Plugin” button on the top. Click on it.
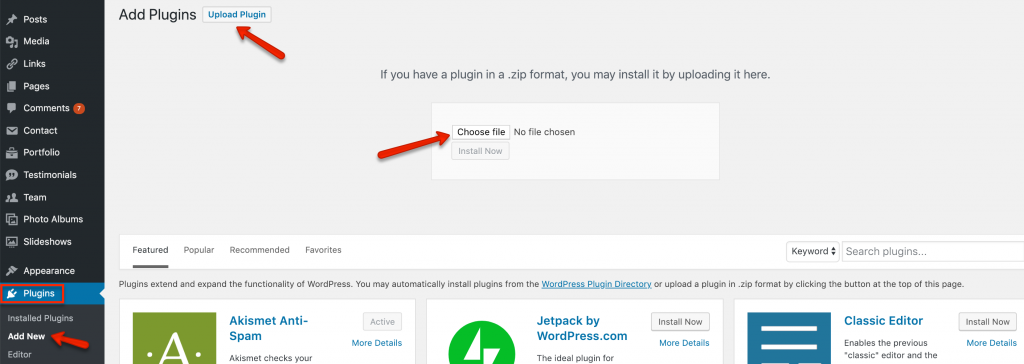
You’ll be taken to a plugin upload page. Simply upload the .zip file that you’ve downloaded earlier and click “Install Now”.
Once the plugin is installed, click the Active Plugin link to start using the plugin.
At the time of this writing, WordPress only allows you to upload .zip format if you like to upload any WordPress plugin or theme.
How to Install WordPress Plugins Using FTP?
This is another method that is very useful when you can’t install a WP plugin using the WordPress dashboard.
You simply download the plugin from the WordPress plugin library, unzip it, and upload it to your WordPress plugin library using your FTP software. You can use FileZilla which is free and available for all major computer OS.
Normally, the plugin upload folder is located under wp-content/plugins.
Once you are done uploading the file, you can simply go to the WordPress plugins folder in the WP dashboard and activate the plugin. This is a very useful method for those who don’t have access to installing plugins or themes from the dashboard due to server restriction.
Conclusion
Personally, I prefer using the dashboard’s search and upload feature. Only in specific cases do I need to use the FTP method.
Managing WordPress plugins is also easy. All you need to do is go to the plugins folder in the WP dashboard and activate or deactivate plugins with a single click.
Sometimes you may find that you’re facing issues with your WordPress site after installing a certain plugin. Simply log into your dashboard via FTP and deactivate that plugin. Certain plugins are not compatible with certain versions of WordPress and will cause problems.
If you have any problem or question, feel free to comment below.
Last but not least, if this post was of any help to you, please share it on Facebook, Pinterest, and Twitter.
A quick share from you would seriously help the growth of this blog. Thank you so much!


