
How To Start A WordPress Blog On Bluehost in 5 Minutes

After much researching and endless experimenting, I found that Bluehost is one of the best web hosting sites out there. It’s no surprise why so many bloggers choose Bluehost for their blogs.
This article will teach you How to start a WordPress blog on Bluehost step-by-step within 5 minutes. So, Are you ready to get started?
Get a Free Domain Name and Hosting
Click here to visit Bluehost official site (We have already added the discount promo code to this link so that you can get up to 66% off + free domain name).
Once you are on Bluehost official site, Just click on "Get started now" button to claim your free domain and get your Bluehost hosting plan with my special price.

On the next step, You need to enter the domain name you want to go with.
Tips for choosing a domain name
- Keep it short, simple and easy to remember. Unfortunately, most of the short domain names are already taken. You can use this domain name generator to turn your ideas into fresh, available domains.
- Make it easy to spell.
- Use .com extension instead of others like .org, .net, .info, .biz. According to Registrar Stats research, over 75%of the domains have “.com”, followed by “.net” and “.org”. “.com “is easier to remember and more familiar.
- Think long term. Your domain will define your brand and business for years. You don’t to go through the trouble of changing your domain name in the future which will cost you money, SEO rankings and branding.
It will be much easier if you get both hosting and domain name at the same time with Bluehost. I recommend you get your domain directly with Bluehost.
To get a FREE domain, all you have to do is choose a minimum of 12 months worth of Bluehost web hosting.
To get a FREE domain, all you have to do is choose a minimum of 12 months worth of Bluehost web hosting.
Choose Your Bluehost Hosting Plan
Bluehost offers 3 shared hosting package, and all packages come with one free domain name, Free SSL Certificate & PHP 7.0 support. Here are the packages:
- Bluehost Basic: Let you host 1 website
- Bluehost Plus: Let you host up to 10 Websites ( Recommended plan)
- Bluehost Prime: Recommended for those who need who.is privacy for the domain.
I recommend you to go with Bluehost plus package for 2 or 3 or 5 years term because higher the term plan will be, you will get more saving.
If you’re just getting started, you can get the Basic plan. You can always upgrade later as your website grows.
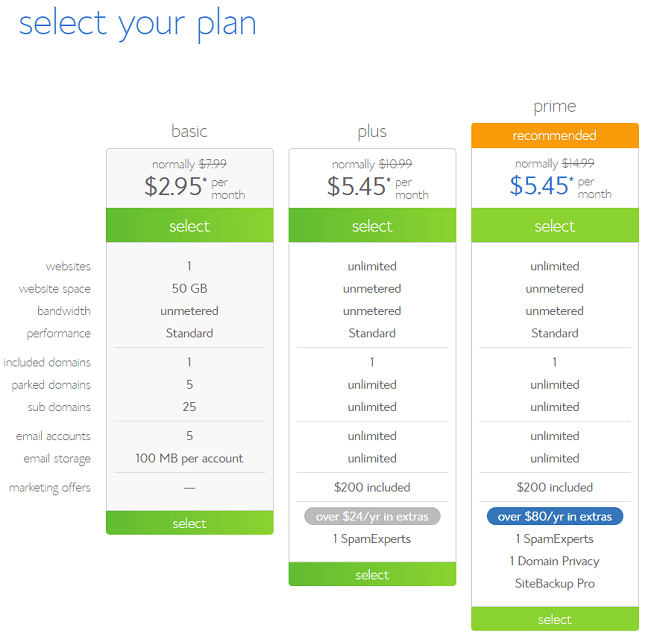
Once you’ve decided on which plan to choose, click “select”.
Setting up Your Domain and Hosting
Once you’ve picked a plan, you need to enter your domain name. Here’s what the page will look like on Bluehost:
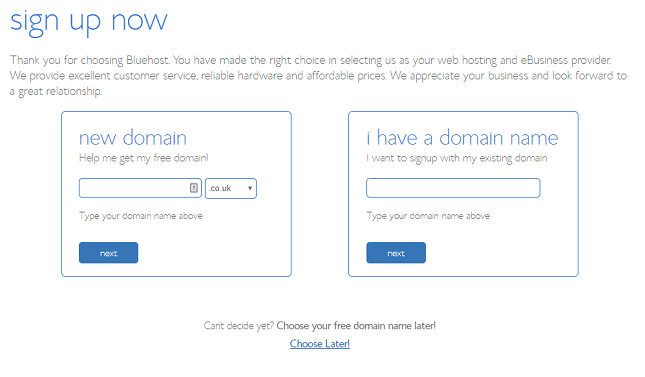
On the drop-down menu next to the name box you can choose whether your domain ends in .com, .net, .org or another variety. Think about which option is most relevant to your site and who you expect your visitors to be.
Don’t worry if you’ve already got a domain name, you can enter it into the box on the right.
There are two options: Create your new domain name or Enter your existing domain (if you already purchased your domain with another provider)
Once you’ve done, click “next” button.
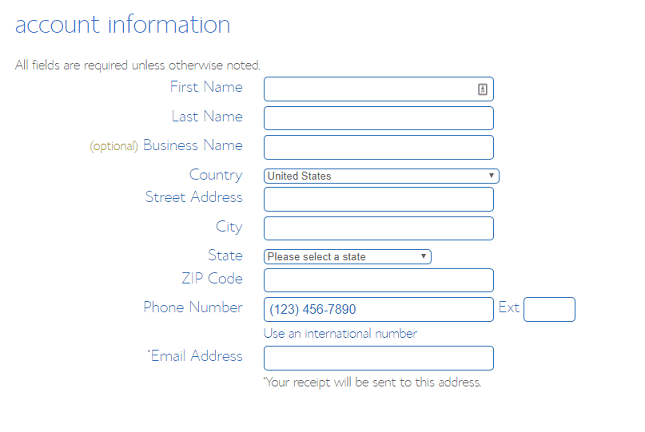
Create a Bluehost Account
The next step is to create your Bluehost account. Fill out the details on Bluehost’s form…
…and double-check your package information:
Before proceeding to payment, you’ll need to select the account plan: 12 months, 24months, 36 months, and 60 months.
Want to get the best price and save more money? Select 36 months for your hosting plan.
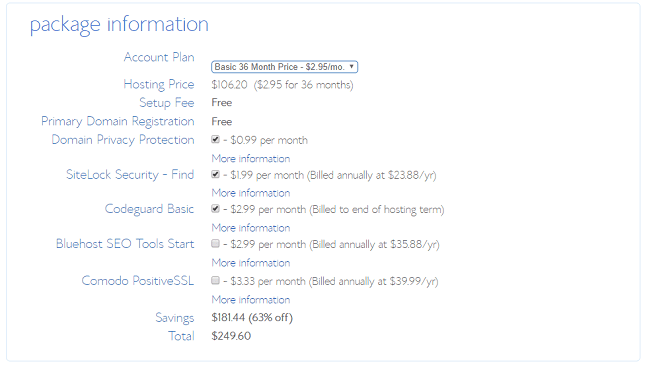
Watch out for pre-ticked add-ons. If you don’t want the optional extras, make sure you uncheck the boxes.
You might want to keep your personal information private ( phone number, email, and address) with domain privacy protection.
We suggest you keep it simple. You can always add more features at a later stage.
Complete Payment Information
Enter your credit card details, agree to their terms and conditions and click the “Submit” button to complete your purchase.
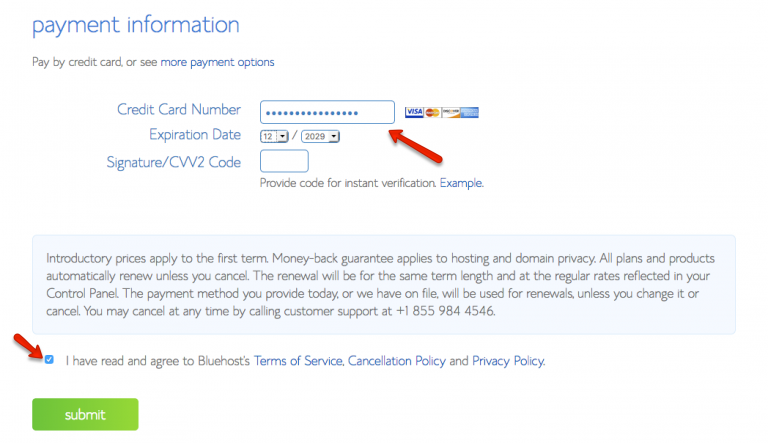
Make sure you understand that Bluehost only offers a promotional price on the first bill. This means that the next time you renew your plan, you’ll need to pay at the regular price.
That’s why I highly recommend you buy a hosting package for 3 years term to get maximum Bluehost discount.
Connect your domain to Bluehost hosting account
If you already have an existing domain or decided to buy your domain from Godaddy, then you need to connect your domain to your hosting account before you can continue setting up your WordPress blog.
You can skip this step if you get your domain directly from Bluehost.
Here’s the full support page from Godaddy on setting nameservers for your domain.
- Log into your Godaddy account manager page.
- From the “Manage your account” list , select “Manage Domains”.
- Use the checkboxes to select the domain name you want to use for your website and then click “Set Nameservers”.
- Log into your Bluehost cPanel. Make sure you use the login information from the Bluehost welcome email that you’ve received.
- On your Bluehost cPanel, find your nameservers ( They should look like this: “ns1.bluehost.com”, “ns2.bluehost.com”).
- Now, go back to your Goddady account, enter the updated nameservers in the spaces provided under “Name Servers” and click “Save Changes”.
- Next, you’ll need to add your Goddady domain as an addon domain to Bluehost. On your Bluehost cPanel, click “Domains” > “Assign”.
It’s very simple, just follow these steps you’ll be able to connect your domain and hosting in minutes.
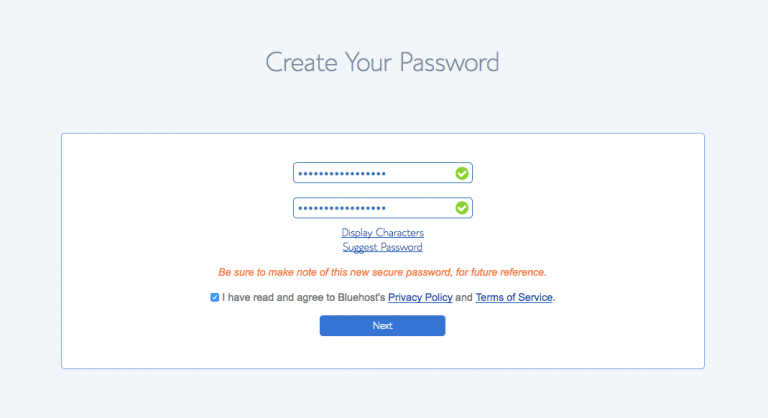
Create a Secure Password For Your Account
Before you proceed, you need to create a password for your account.
Keep this password secure as you need it for account verification purposes when contacting Bluehost support.
Install WordPress on Bluehost
Bluehost has completely revamped its web-hosting and made it WordPress oriented. Unlike old times when you had to create your blog manually, these days Bluehost automatically install and setup WordPress for you.
If you have followed the above guide and simply purchased hosting + free domain name from Bluehost, it will start installing WordPress for you automatically.
Bluehost will take care of the technical aspects and automatically install WordPress for you! It’s FREE!
Login to Your WordPress
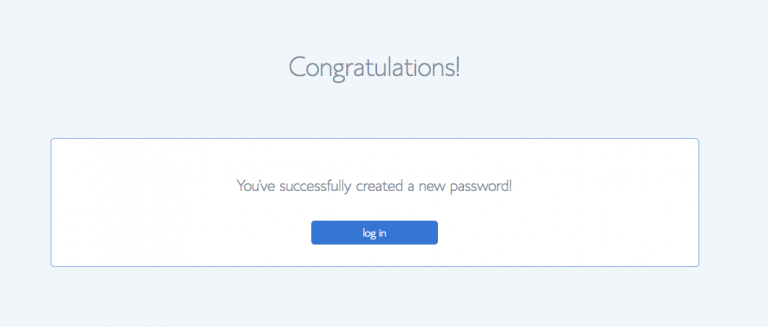
That’s it! You now have your new WordPress blog.
Next, Bluehost will guide you through exactly what you need to do in order to start a blog.
Choose a Template for your WordPress Blog
Login to your WordPress board, choose a beautiful theme for your blog and start designing your website!

WordPress offers lots of free themes which you can choose from. Browse through the selection and simply click on the theme you like to activate it.
If you want to do this later, you can randomly pick a theme first and change it later.
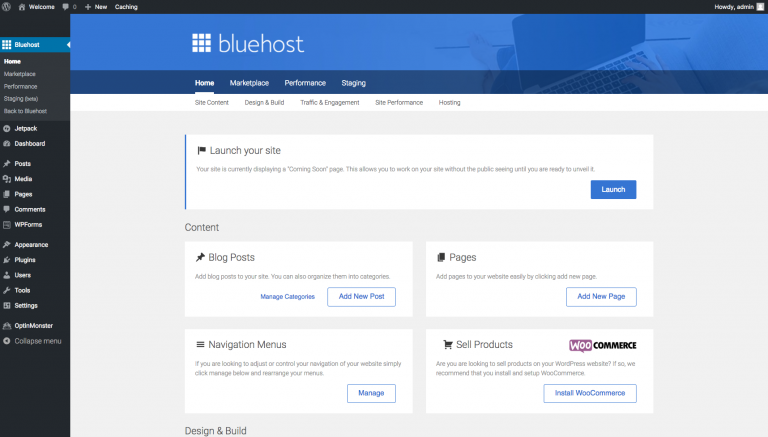
WordPress Dashboard
On your WordPress dashboard, you can either choose “Business” or “Personal” – it’s up to you.
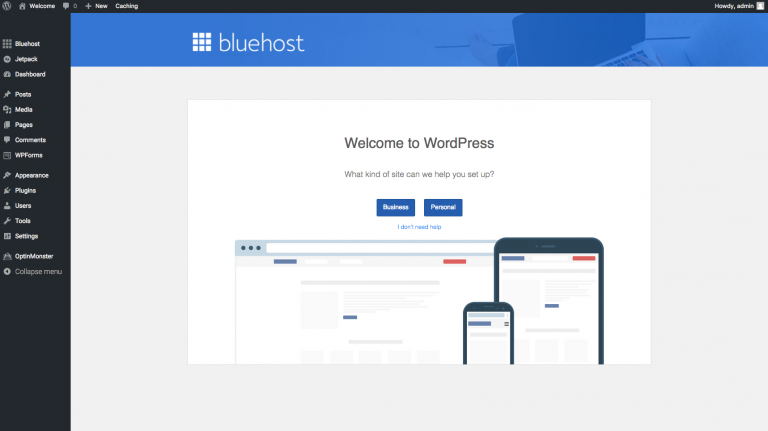
As you can see in the screenshot below, it’s interface is very user-friendly.
Now you have a WordPress blog, let’s start designing and creating high-quality content!
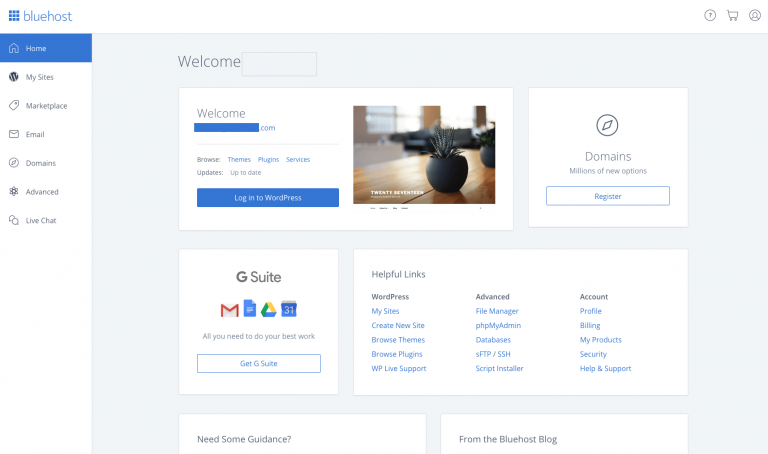
You can also access cPanel from your Bluehost Dashboard. It is extremely simple and easy to use by anyone.
Even new users with no technical experience can easily set up, manage and control websites, domains, emails and more, all in one place.
You’ll need to customize your WordPress by installing a plugin which can help to enhance your blog such as improve SEO and build a bigger following.
If you need help on getting started with WordPress, simply contact the support team via 844-741-1192 and ask to begin your Blue Spark service.
A dedicated support team will be assigned to will walk you through every step of getting started with WordPress such as navigating the Bluehost and WordPress dashboard, selecting the best plugins and themes for your WordPress website.


