How to Create a Google AdSense Account Step-By-Step
As a blogger, You have surely heard of the AdSense program from Google which is regarded as one of the best contextual advertisement programs available.
There are many articles about how to get Google AdSense approval fast with a new blog over the internet but There are only a few articles about how to create a Google AdSense account and only countable articles that describe complete steps to create Google AdSense account.
In this post, I will demonstrate how you can create an AdSense account step-by-step for your website.
There are many AdSense alternatives available, but no matter what network you try, you will likely find that Adsense is the best.
If you have some marketing skills, however, you may also want to look into affiliate marketing. My post on Affiliate Marketing vs AdSense will give you my personal insights into both networks.
What is Google AdSense?
Adsense is a program run by Google that allows publishers, bloggers and website owners to earn income by displaying ads. The advertisements can be in text, image or video format. These ads are managed by Google.
There are two main ways that you can make money from Google Adsense:
- CPC (Cost per Click) – CPC which is also known as PPC(Pay per Click) is an advertising model used to direct traffic to websites, in which an advertiser pays a website owner when the ad is clicked.
- CPI (Cost per Impressions) – CPI which is also known as Cost per thousand impressions(CPM). CPI is the cost or expense incurred by each potential customer who views the advertisement. On the other hand, while CPM refers to the cost or expense incurred for every thousand potential customers who view the advertisement.
Don’t ever click on your own Adsense ad or ask someone to click on your ads. Else, you may get your account banned for life, simply because it’s against Adsense program policy.
Are You Ready To Join Google AdSense?
There are a couple requirements which you must meet before you can apply for AdSense:
- First, of course, You need to have a website.
- A Google Account.
- You also must be above the age of 18, otherwise, you will need to apply using the name of a parent or guardian who gives you permission to do so.
Keep in mind, A website with original and quality contents has a better chance to get approved AdSense account quickly.
Is This Right Time To Show Google AdSense Ads on Blog?
You can enroll for Adsense at any point whether your site is new or old and start serving ads. But I would suggest serving no ads before getting some popularity.
Popularity in terms of PageRank, Monthly Views, etc.
Start serving advertisements including Adsense ads after getting more than 3,000 views per day i.e. approx 100,000 views per month.
Of course, if you are getting this much traffic especially from a search engine, your site’s PR would be at least 2 or 3.
How Adsense Works?
Google provides a simple and efficient way to earn money from your online content. Adsense works in these three simple steps.
- Make Space for Ads: You need to make your website ad spaces available by pasting ad code on your site, and choose where you want the ads to appear.
- Advertisement Bids: Advertisers bid to show in your ad spaces in a real-time auction. The highest paying ad will show on your site.
- Get Paid: Google handles the process of billing all advertisers and networks for the ads on your site, to make sure you receive your payments.
Google AdSense Application Process
It’s pretty easy to apply for an Adsense Account. Here’s how the Adsense application process goes:
- Make sure your website/blog is compatible with Google Adsense.
- Sign up for an Adsense account
- Add Adsense code to your website/blog
- Wait for your account approval. Adsense will review your account which takes up to 2 weeks.
- Enter your Adsense Pin and start receiving your ads revenue.
Step 1: Sign Up For AdSense
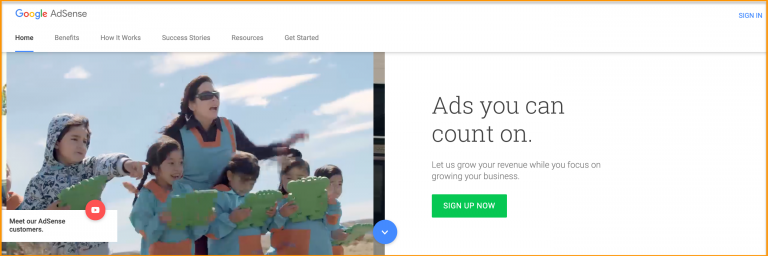
Go to Google Adsense page and click “Sign Up Now” to create an account.
Step 2: Complete AdSense Application Form
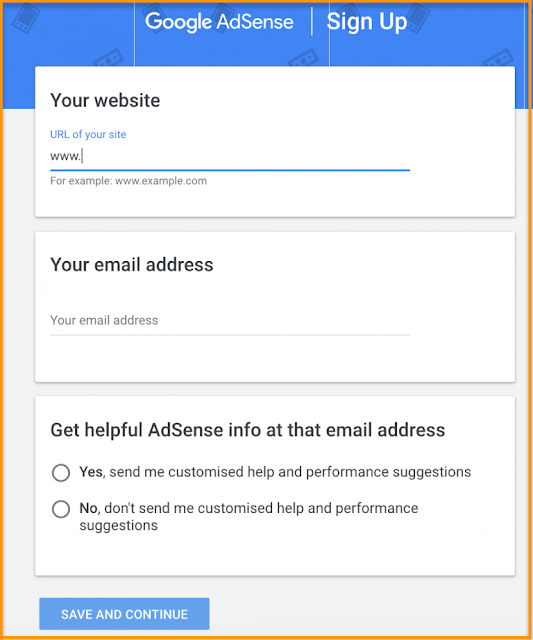
Next, fill up the form with your information:
- Enter a website URL that you want to show ads on. (Do NOT add https:// in front of your URL).
- Email address.
- Choose whether you want to receive any Adsense info at your email address.
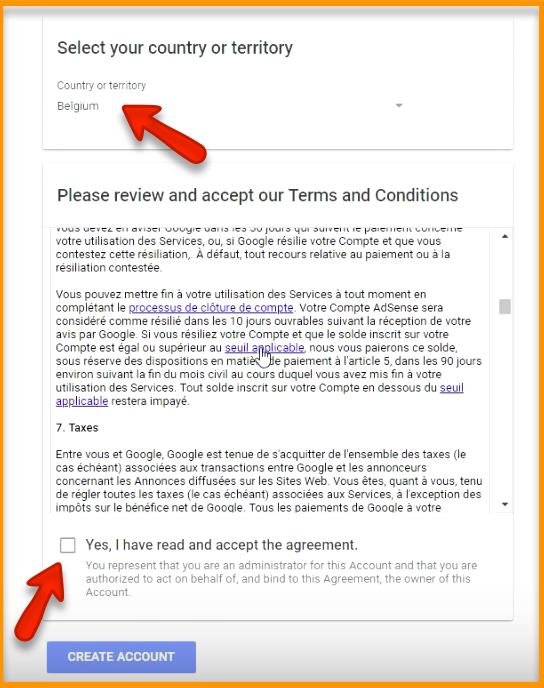
On the next page, you’ll have to select your country.
Agree to their terms and conditions and click “Create Account” button to complete your application.
Agree to their terms and conditions and click “Create Account” button to complete your application.
Step 3: Activating Your AdSense Account
Once you log in to your new Adsense account, you’ll notice that some of the options on the left sidebar are grayed out. Because at this point, your account is not fully activated yet.
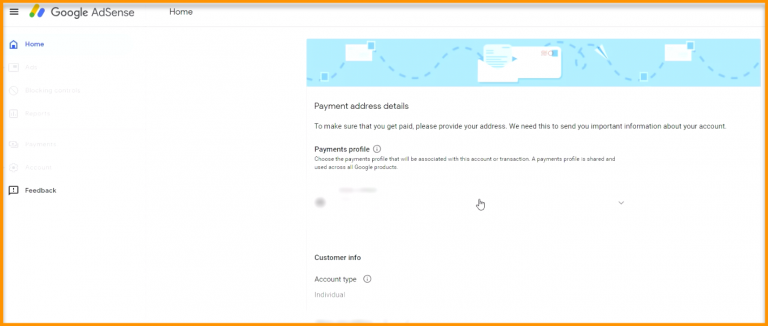
To activate your Adsense account, you’ll need to complete the following steps:
- Add Adsense codes to your blog
- Provide your payment address details
- Verify your phone number (Not required in all countries.)
Add AdSense Codes To Your Blog
Copy and paste the code given into the HTML of all pages where you want ads to show or into your site’s header (by using a plugin such as Insert Headers and Footers).
While your account is under review, ads will show as blank until your account is approved.

Here’s an example HTML page with the code added:
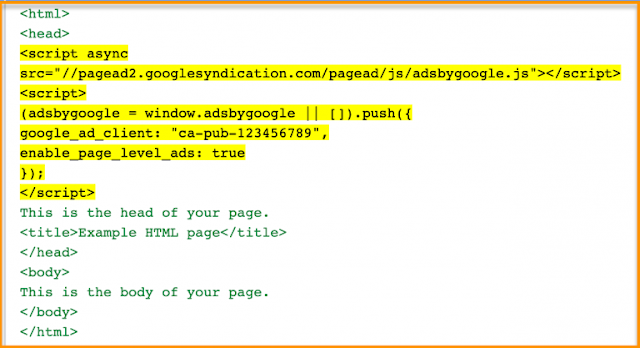
Make sure you paste the code between the <head> and </head> tags
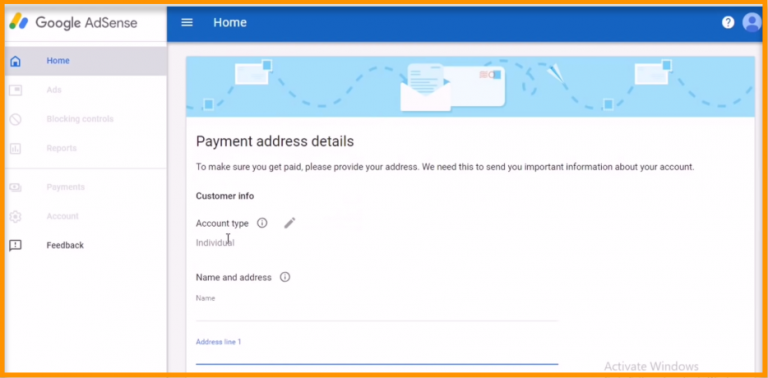
Provide Your Payment Details
Enter your payment address, full name, and phone number.
Make sure you enter your the full postal address correctly so you can get your Adsense PIN (explained in step 5 below) in order to get PAID!
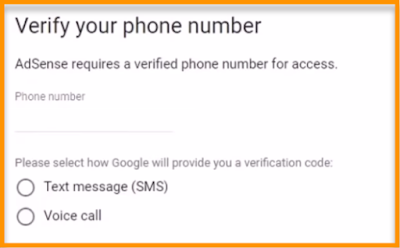
Verify Your Phone Number (Not Required In All Countries)
If you see a note on your homepage, then you will need to verify phone number by entering a verification code.
Step 4: Wait While AdSense Team Review Your Application
You’ll receive a confirmation email once it’s approved.

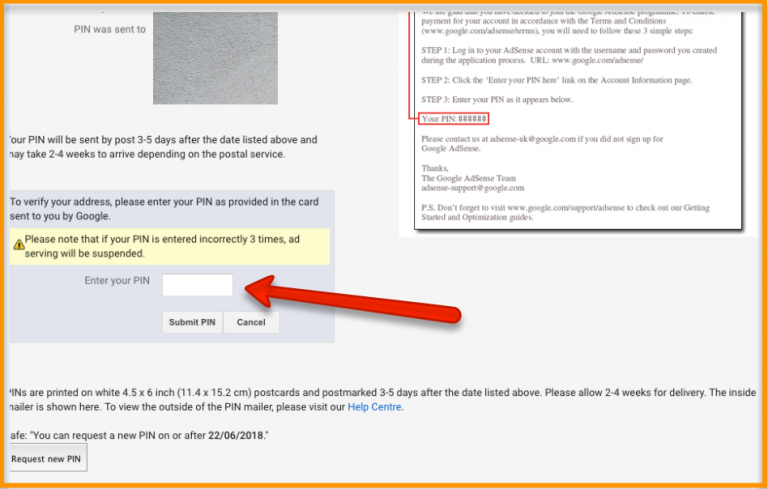
Step 5: Enter AdSense Pin
Adsense will automatically mail you a PIN to your physical address once your earning reaches $10. Log in to your Adsense account and enter your PIN when you receive it.
One last thing you’ll need to do is submit your tax information. That’s it. You’ve completed all the steps for activating your Adsense Account.
You’ll get your first payment from Adsense once you reach the threshold of $100.
The fastest payment method is using a bank transfer. Go to your Adsense homepage > Payments > Payment Methods > Add payment method, enter all your bank details so you can easily receive your earnings.
Conclusion
Do you have any problem or question following this tutorial to create your account with Adsense? Feel free to comment below.
If you do not have a blog, follow this step-by-step guide to start a WordPress blog on Bluehost in 5 minutes. I’ll show you everything you need to do to start a successful money-making blog.
Once your blog has more than 10,000 visitors a month, sign up for Ezoic to boost your Adsense earning for absolutely FREE! Check out how I increase my Adsense ad revenue x1000x almost instantly with Ezoic here.


