
How to Start a WordPress Blog on HostGator Step-by-Step

So you want to learn how to start a blog? Great! I’ll teach you how to start a WordPress blog on HostGator using some simple steps that I followed to make this very blog.
No matter your reasons for wanting to start a blog, I can tell you from my experience that it’s worth it. Whether you want to express your thoughts through writing, increase traffic to your business, help people out, or anything else, you should start a blog. It’s cheap and it’s fun — not to mention it’s a great learning experience!
This tutorial will teach you how to start a blog on HostGator. Don’t want to use HostGator? I also have a tutorial on How to Start a Blog on Bluehost if you prefer Bluehost.
1. Choose Your Hosting Plan
Go to HostGator official site, click “Get started!”
HostGator has different hosting packages depends on your needs and budget as below.

Choosing the best plan could be tricky. I would suggest you start with the least you can afford, you can always upgrade later as your website grows.
The most popular HostGator plan is Baby Plan.
If you are not a business, then you can go with the Baby or Hatchling plan. With Baby Plan, you can run multiples blogs. For those who are new to blogging, Hatchling plan would be the best choice.
The difference between the two is that, with Hatchling plan you can only register one domain, which is perfect for beginners. If you’re planning to run multiple websites, then you’ll need the Baby Plan. You should take into consideration that it’ll save you money if you choose a longer plan that goes for one year or longer.
All the hosting plans come with unlimited email addresses and storage. In addition, HostGator has the drag-and-drop website builder option which is very easy to use, you don’t have to know how to code to use it. You’ll get a Google Adwords and Bing/Yahoo credit too so you can advertise your blog.
Once you’ve chosen the right package, click the “Sign Up Now” button and fill in the required information.
2. Register a domain
A domain name should be a reflection of your business name or what you’re doing. It’s very important because your website name is the first thing your visitors will see. It’s also how people will find you online. You want a good domain name that can make a lasting and positive impression.
You can check domain availability on HostGator. On the HostGator Order Wizard page, simply type in your selected domain name and click “Search”. It will tell you the availability of that particular domain name. If the domain name is already taken, then you cannot use it. You must use a domain that no one has registered yet.
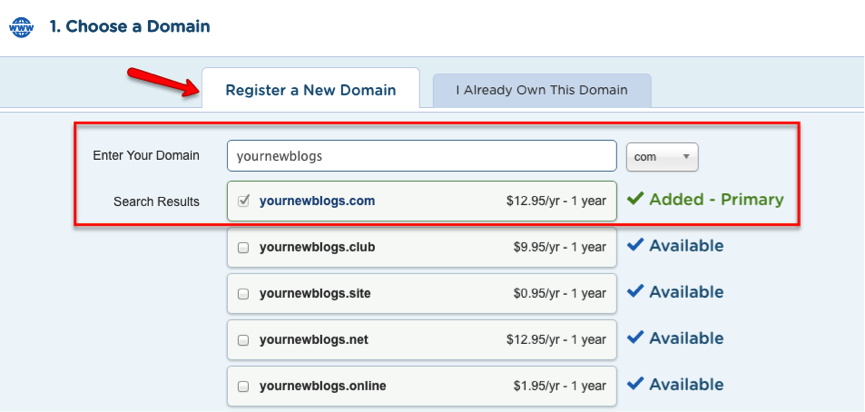
For example, my domain name is presentblogging.com. So your website name would be yourname.com.
New Domain name will cost from $0.95-12.95 per year, which will be added to the total at the end. It’s worth paying for the “.com” extension which usually costs $12.95/year.
Tips for choosing a domain name
- Keep it short, simple and easy to remember. Unfortunately, most of the short domain names are already taken. You can use this domain name generator to turn your ideas into fresh, available domains.
- Make it easy to spell. Avoid using a long and confusing name. You don’t want your visitors to mistype your domain name and end up on a different website.
- Use .com extension instead of others like .org, .net, .info, .biz. According to Registrar Stats research, over 75%of the domains have “.com”, followed by “.net” and “.org”. “.com “is easier to remember and more familiar.
- Think long term. Your domain will define your brand and business for years. You don’t to go through the trouble of changing your domain name in the future which will cost you money, SEO rankings and branding.
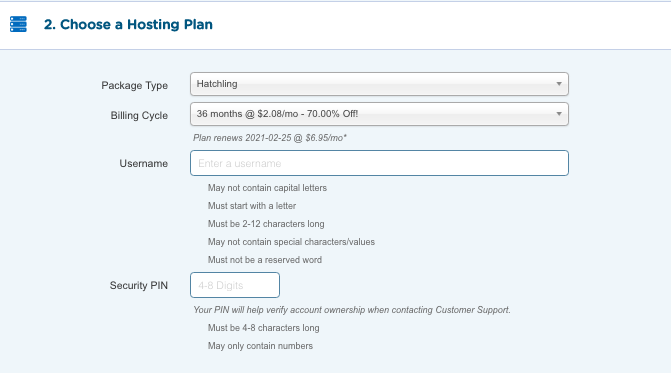
3. Complete the HostGator Order Form
Next, you have to enter your hosting package information. You can save more money by signing up for a longer period in the “Billing Cycle” section. I paid for 36months upfront which is the cheapest option per month. For the Hatching plan, it costs about $75 for 3 years.
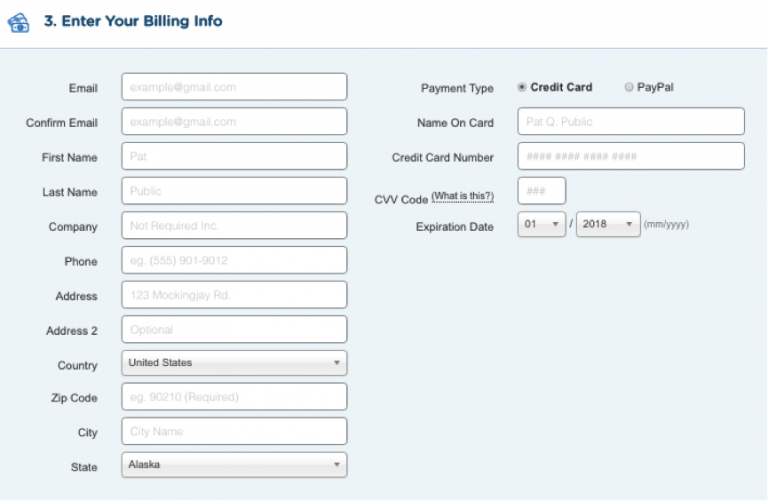
Then, you have to enter your billing information, choosing any add-ons and create a HostGator account.
4. Install WordPress on HostGator
Now, you have created your own website! Let’s learn how to install WordPress on your site.
WordsPress is one of the most popular and easy to use blogging options. And it’s free!
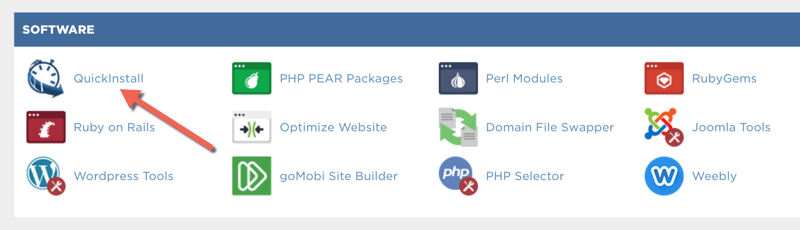
After setting up an account on HostGator, you’ll receive a welcome email from HostGator. Open this email which contains your account information so you can login. Click on the Control Panel (cPanel) link that is sent to your email.
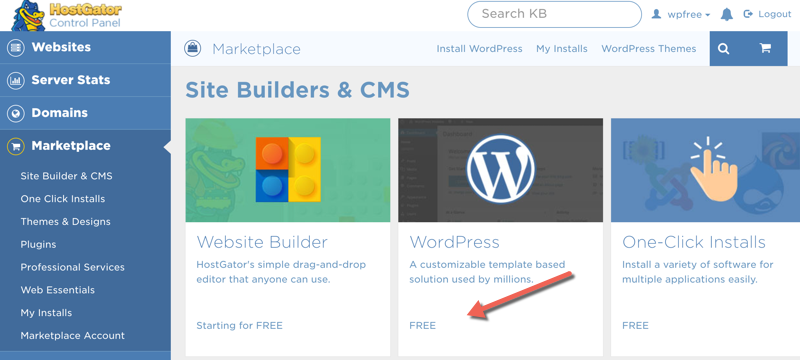
Once you’re on the Control Panel, scroll down to “Software/Services” and click “Quick Install”. From there you’ll be able to install WordPress with just a click.
On the left-hand side, look for “WordPress” and click on it.
On the next page, drop-down select the domain on which you want to install WordPress blog.
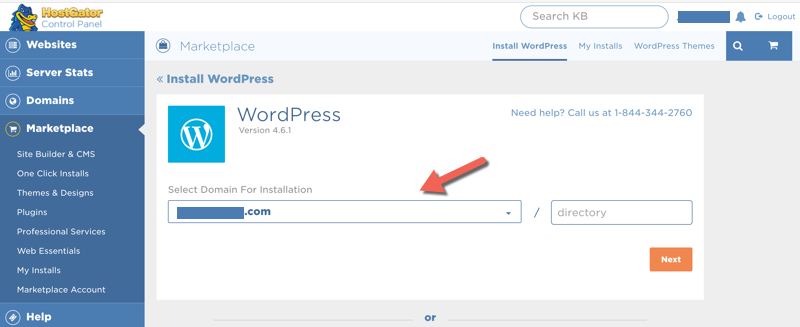
Here you can decide where you want to install WordPress. Either at the root of the directory or under the subdomain. For example:
- Root Directory: https://presentblogging.blogspot.com
- Subdirectory: https://presentblogging.blogspot.com/blog
If you are new to HostGator and have a baby plan or above plan, you can add as many domains as you want and you can host multiple websites on a single hosting package.
Click on next & now configure rest of settings as directed below.
Make sure that you don’t use “admin” as username, as this is a security risk. Rather use your email address or your nickname.
The point is to make it hard to guess. Before hitting the magic button Install WordPress, Cross check if you have done everything right. Else rolling back things will consume time.
Here is how my settings look like:

While HostGator Quick Install is setting up your WordPress blog, it might try to upsell you by offering stuff like WordPress theme or any such service.
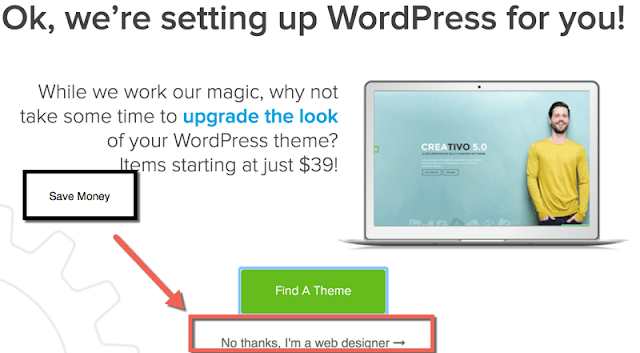
I suggest you Skip it & I did the same. It’s easy to Install WordPress of your own. It will take few minutes, and your WordPress blog will be installed & you will get an email with your dashboard link, username & password.
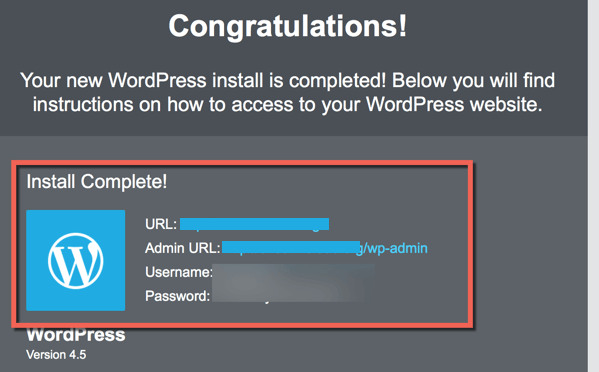
On HostGator server and you can access your WordPress dashboard by going to “domain.com/wp-admin” (Replace domain.com with your actual domain name)
Make sure you add your email here. So that information about the installation will be sent to your Email blog.
5. Get a WordPress Theme
Well done! Now you have started a WordPress blog on HostGator. Next, you can work on the design by selecting a theme for your blog.
There are a variety of beautiful free themes on WordPress to choose from.
If you’re looking for premium WordPress themes with advanced functionality, here’s a list of best SEO optimized WordPress themes for your blog/ website.
6. Start Blogging
That’s it. Now you’re blogging. Don’t forget to promote your website using social media too.
If you found this post helpful, please click on any of my HostGator affiliate links in this review, you will an additional 25% discount on any package. This is something special only for my readers…
Create A Website For Just One Cent For Your First Month! Use Coupon: 1CENT.
I want to hear from you!
Do you have any concern not to self-host your own blog?
Do you have any problem or question following this tutorial to create your own blog with HostGator? Feel free to comment below
Once you set up your own blog, please tell me about it and remember to send me your link! You can leave a comment below or find me on Facebook or Instagram! Welcome to the Family!


